Review on Maybelline Clear Smooth All-in-One Cake Powder to Go

10:26 PM Unknown 0 Comments

It's been long since I used powder on my face because I was told that it clogs the pores so ditched it and was just using BB cream. However, my face gets really oily and I can't stand the shine it is giving my face so I told myself that I would start using powder again.

So I was browsing through Zalora (Since I am that lazy to go to the department store to buy a face powder. haha) when I saw this Maybelline Clear Smooth All-in-One cake powder to Go. It was really really cheap, it costs Php 99 so I said I would try it. And now, after a few weeks of using it, want to make a review about it.

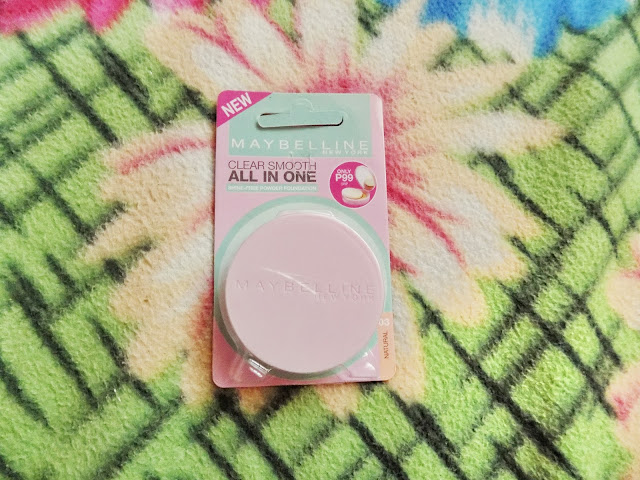
Maybelline Clear Smooth All in One

Like I said earlier, this costs Php 99 so do not expect a big size. But I think you would not need a big one since you won't be using much of it because it reduces the oil on the face after just a few application. Also, the shade the I bought is in the shade natural, there is also a beige shade though I am not sure if there are other shades available.

Packaging

Just like before, let us first talk about the packaging of this cake powder. When I received it, it was in a box together with the other item I bought from Zalora. the products are also wrapped in bubble wrap which is good. 


I don't see anything wrong with their packaging. I think all the information you need to know is stated there, like the SPF, how long it would last, etc. Although I was not able see the expiration date so I think it was not stated or maybe it was covered by the white sticker by Zalora, I am not sure. Refer to the picture below to see what I am talking about.

Maybelline Cake powder

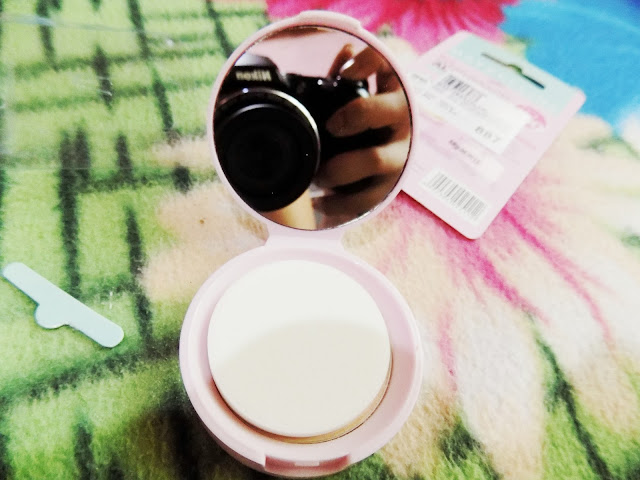
Here is how the compact looks inside. It has a soft applicator, I am not sure what it is called but is has a spongy feeling and is really soft and smooth on the face. What I don't like about this applicator is that a lot of product gets stuck to it in every use so you have to clean it regularly to not spread the bacteria to your face.

Maybelline All in One Cake Powder

Also, like the other compact powders, there is a film between the applicator and the cake itself to separate the applicator and the powder.

Maybelline All in One Cake Powder

I have not much negative comments on the packaging but there is nothing extraordinary about it also.

Product

Now let us go to the product. I use this only when my face gets shiny. I must say that this is a really good product. It makes my face shine free for a longer period of time, unlike when I just apply BB cream. However, according to its packaging, it has an 8-hour shine free formula but I don't think my face even lasted for 5 hours of being shine free. I still think it's good though, you can just reapply it whenever your face gets oily. 

Another thing that I like in this product is that it makes my face feel soft! Seriously, it really made my face feel soft and sometimes even my hands. Haha. Because when I touch my face, some of the powder get to my hands so my hands also feel soft. 

As I mentioned earlier, the shade I have is natural. I have a shade or two lighter skin than kayumanggi  skin tone and this shade looks just fine with my skin tone. 

Basically, that is it. There is not much to say about this but this is better than my previous pressed powder because of the matte finish it leaves to my face. I am actually satisfied with it.

Summary

Pros:
  • affordable, for only Php 99
  • informative packaging
  • has a soft applicator
  • makes my face shine-free for a few hours
  • the natural shade suits my skin tone nicely
  • makes my face feel soft
Cons
  • the expiration date cannot be found (or is not really there)
  • small size
  • does not really give you 8-hour long shine free face
Overall rating: 4/5

THANK YOU FOR READING!

0 comments:

Wear Blue on a Rainy Sunday Morning

2:47 PM Unknown 0 Comments

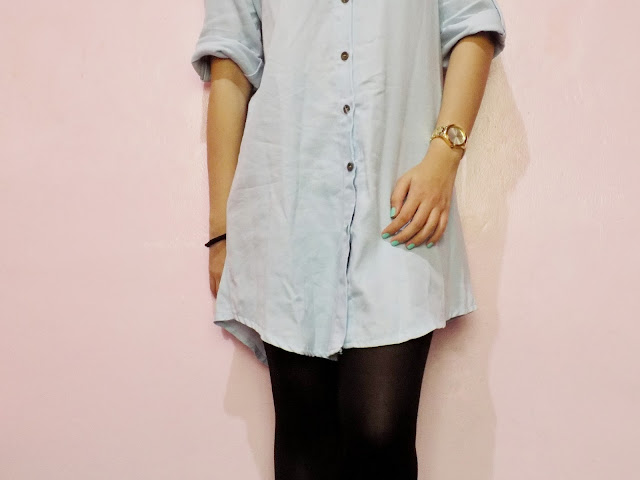
It was raining this morning so I thought that I would wear something warm and cozy since I am the type of person who gets cold easily. It was really hard deciding on what to wear since I might get overboard and wear something too warm. So after a long time of thinking what to wear, I finally ended up with this:

OOTD

I wore a blue button down dress that would match my blue (teal?) nails. Also, this dress has long sleeves (but not too long) so it is perfect for the weather. 


I also wore black tights to make my thighs feel warm. I don't know where I bought this though, I just found this in my closet. I know I have this for years already and that I love it.

Zalora boots

This pair of boots I bought from Zalora also helps warm up my foot plus it also matches my dress and tights perfectly. 


That's all. I hope everyone is having a great Sunday. Thank you for reading! :)


0 comments:

Going with Floral Printed Casual Outfit

8:42 PM Unknown 0 Comments


It is getting hot again and we can almost feel summer coming and I think floral printed outfit somehow represents summer. So I will be sharing this floral printed casual outfit idea that I wore. 


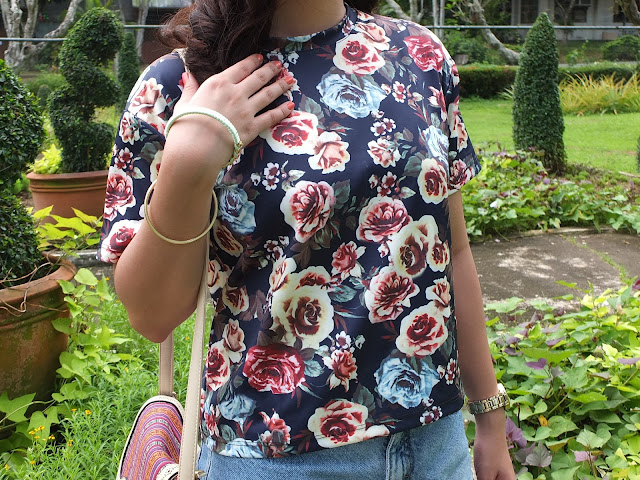
Floral Top

This floral crop top is the center of attention. I bought it at an online shop on instagram.

denim shorts

Since I want to put emphasis on the top, I decided to wear a plain mid waist denim shorts. Its length is a bit short to make my legs appear long. 

solemate doll shoes

What can go wrong with a simple doll shoes? This Solemate flats is cute and matches my top well. 


Gold watch

This gold watch makes any outfit look classy and adds life to a boring outfit combination. I bought this at Zalora at a very affordable price; the brand is Something Borrowed.

bangles

These bracelets are gifts from a family friend and the brand is For Me. These also add life to your outfit.


Printed Bag

This bag is from Michaela. It was on sale when I bought it and looks really nice. It is perfect for any outfit and it does not steal the spotlight from the clothes you are wearing.

That's all with the casual and summery look idea. Take note that being stylish does not have to be expensive.

THANK YOU FOR READING!

Photo credits to Kazia Pacia


0 comments:

Turning Your Ordinary Nail Polish into a Matte Nail Polish

8:55 PM Unknown 0 Comments

matte nail polish

Hi this post will be about the experiment that I did a few days ago. I just discovered this while I was removing my nail polish. So I tried doing it again. Here are the things you would need:

nail polish

Two nail polishes, one the color of your choice and of course the colorless nail polish. You would also need an acetone and some cotton balls. 

So while I was removing my nail polish, I noticed that before the nail polish comes off, it turns into a matte finish so I tried doing it again. What I did was, I painted my nails with more layers than usual then placing the colorless nail polish at the top. These layers will help your nail polish stay while applying some acetone.

matte nails
Applying acetone to middle finger


matte nails


In the picture above, I did the process in the middle finger. You would notice that that nail has a matte finish, unlike the other nails. 

So there, after doing the same process on the other nails, I now have matte nails. However, this is just an alternative, if you have money to spend on a real matte nail polish, you may buy that and it might look better.

matte nails
Matte Nails


THANK YOU FOR READING! Let me know if you tried this trick too.


0 comments:

Trying Out the DIY Nail Art

6:46 PM Unknown 2 Comments

I Just want to share with you guys the "nail art" that I did. I tried doing those nail arts that I saw on the internet; and they are NOT as easy as it seems.

nail polish

Here are my nail polish collection and I chose two colors from here that I am going to use.

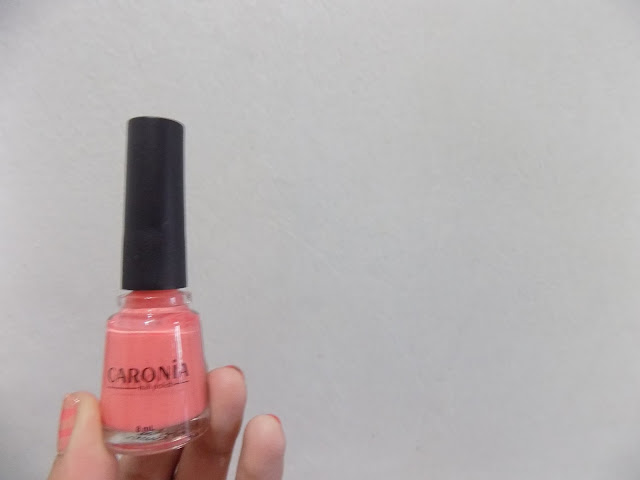
caronia nail polish

chic nude nail polish

I chose these two because I thought they looked nice. However, I would not recommend using these colors if you want noticeable nails.

So here are the things I used


The scissors that I used is really crappy. I cannot cut a straight line with it so the result is not good either. But anyway. I cut small strips of tape and stuck it on my nails to form a pattern. I thought it turned out okay but not good enough because of the zigzag edges. It would be nicer to use real nail art tools or a decent pair of scissors. Haha. You may even ask a professional do it for you. But I think this DIY tools' results is acceptable.
nail art


nail art

 nail art


nail art

These are the finished product. If you want a better and beautiful nail art, go to a professional. Haha. Unless you are bored and you have the materials needed, then better try these yourself. Most of you can probably do better than I did. 

THANK YOU FOR READING! Leave a comment and tell me what you think! :)

2 comments: